


Not sure when to use frames over groups and auto layout in Figma? You came to the right place!
There are a lot of different ways to do the same thing in Figma. However, frames offer functionality that you may not realise, letting you do some cool things you couldn't do otherwise!
Situation One: Frames are Figma's "Artboards"
If you are familiar with other design tools like Photoshop or Illustrator, you're probably familiar with artboards. Traditionally artboards are used as a sort of container for your designs, allowing you to organise different designs with different properties. In Figma, frames behave in a similar way, but with some added benefits.
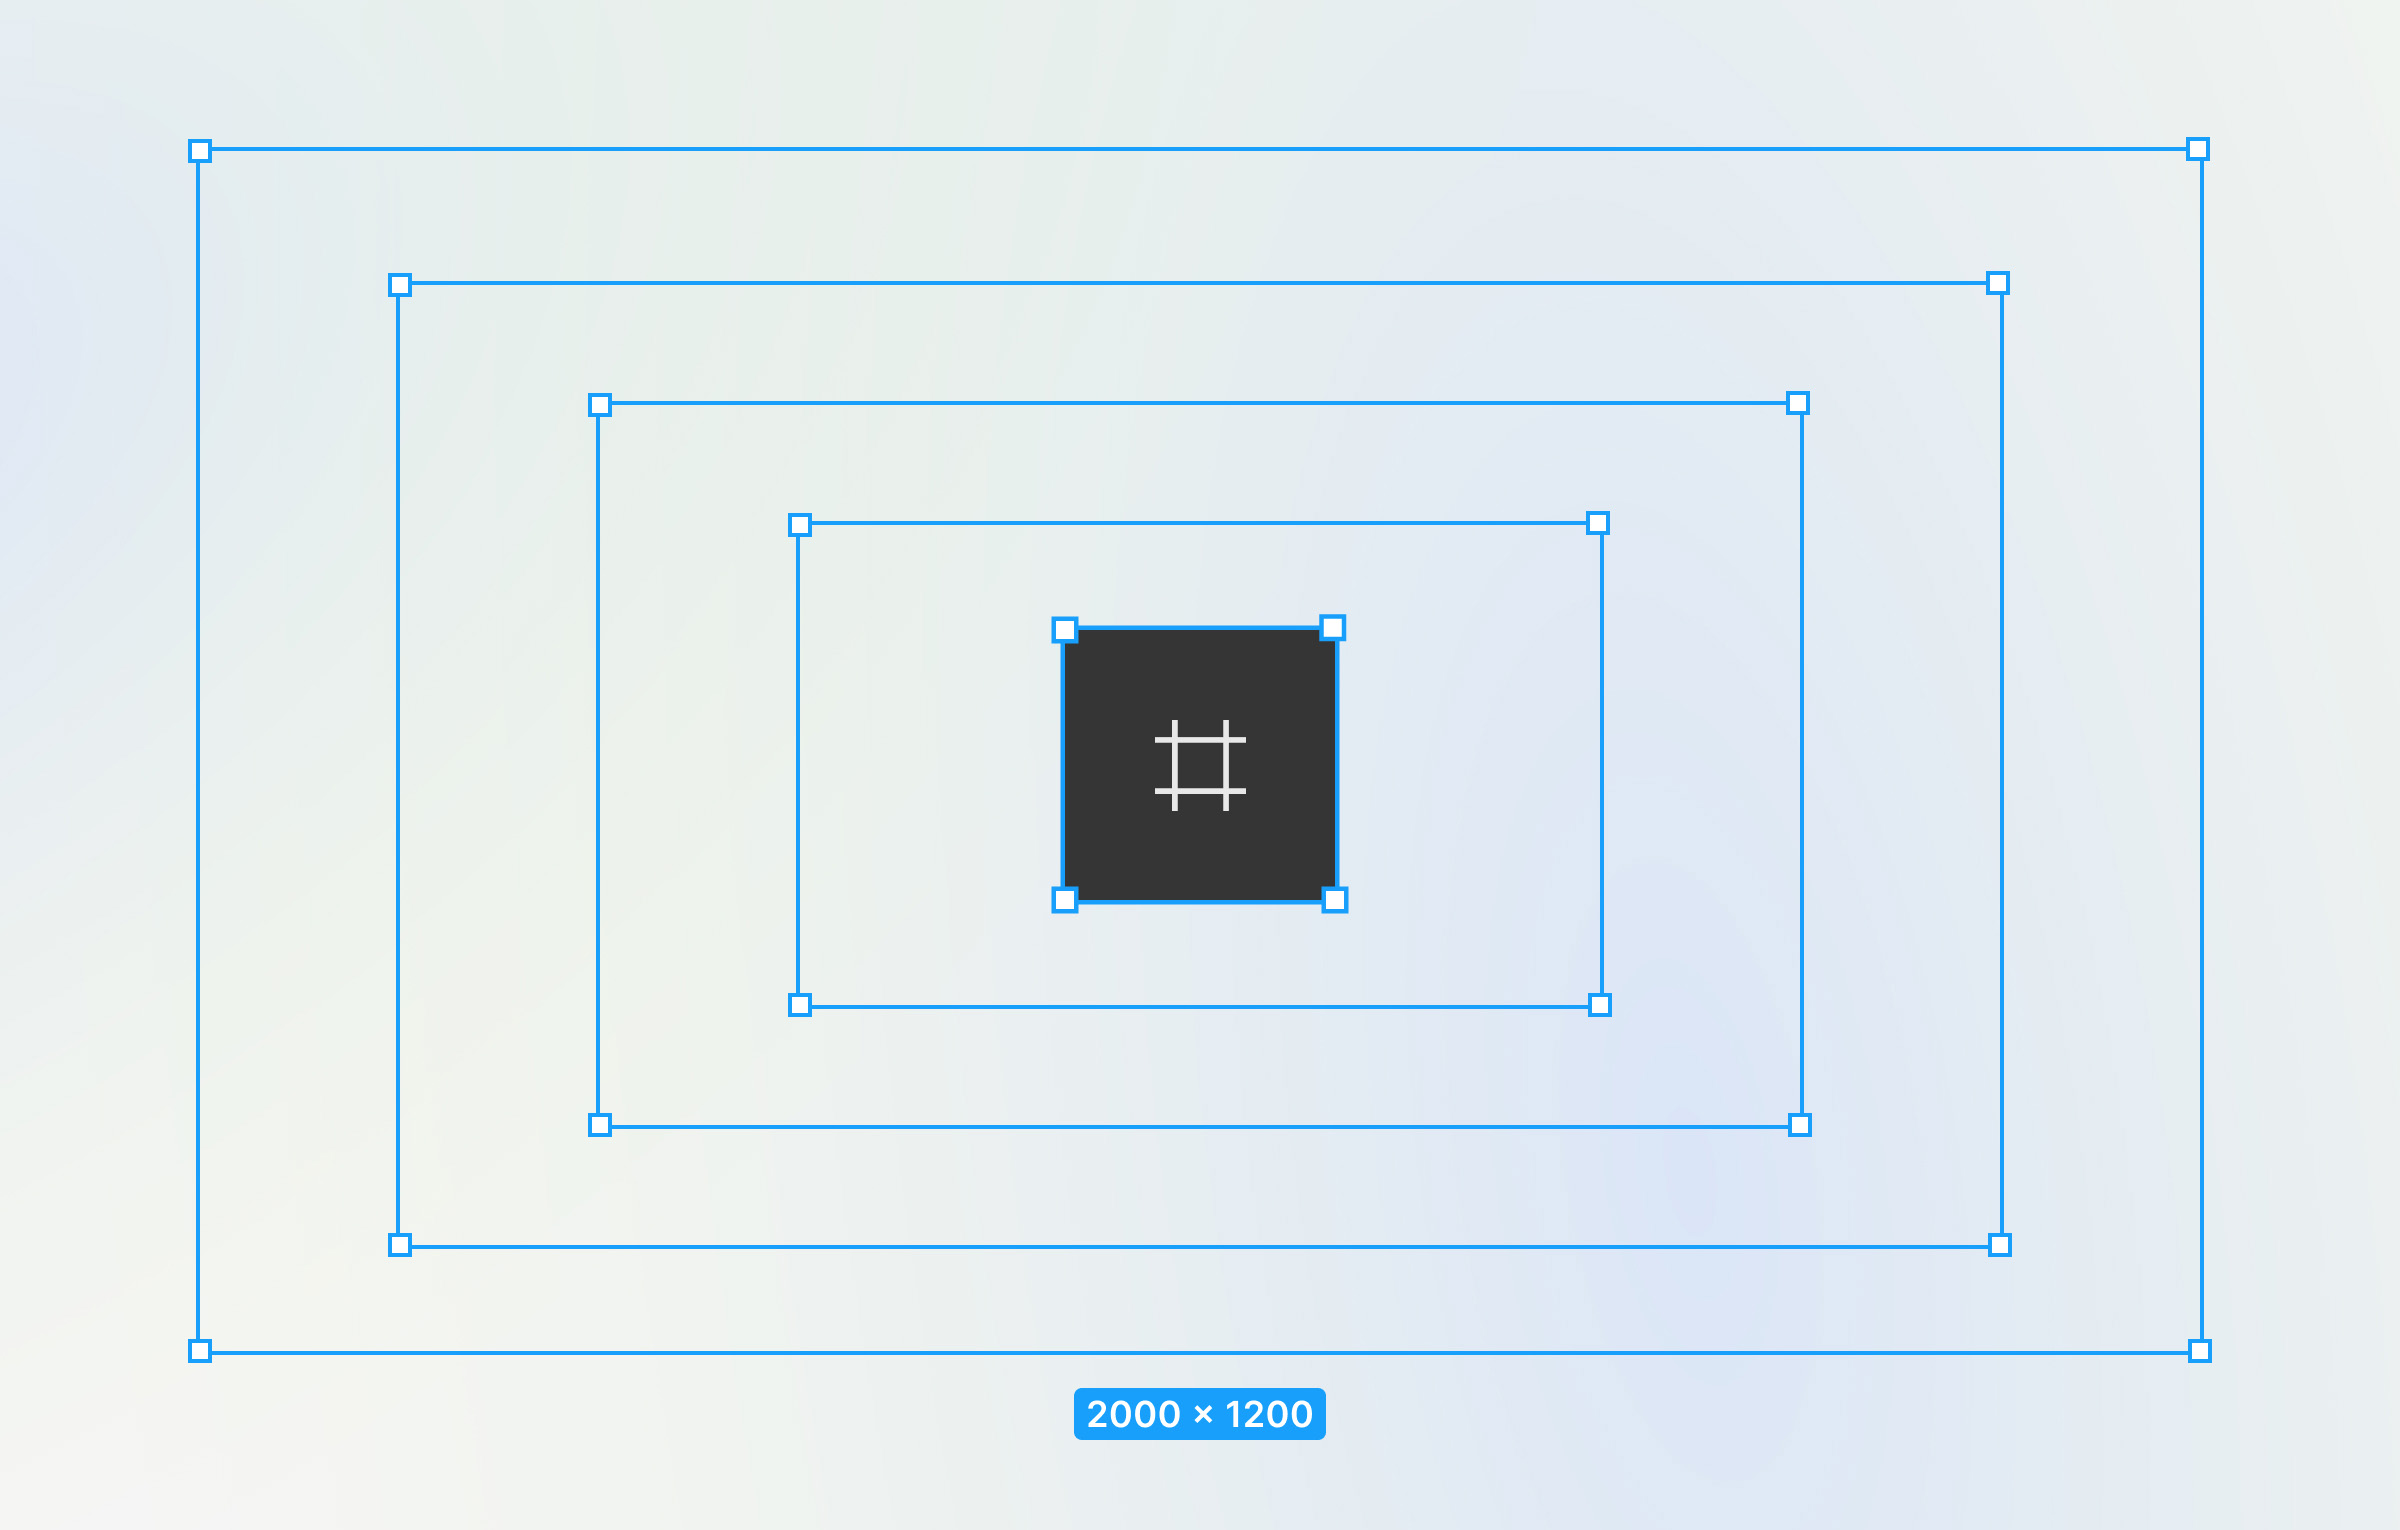
Frames within Frames
In Figma, frames allow you to nest frames within frames. This allows you to create more complex designs and eventually complex interactions through prototypes. Frames also allow further functionality than artboards, allowing you to create designs with nested grids, auto layout and constraints.
So when is the right time to use them?
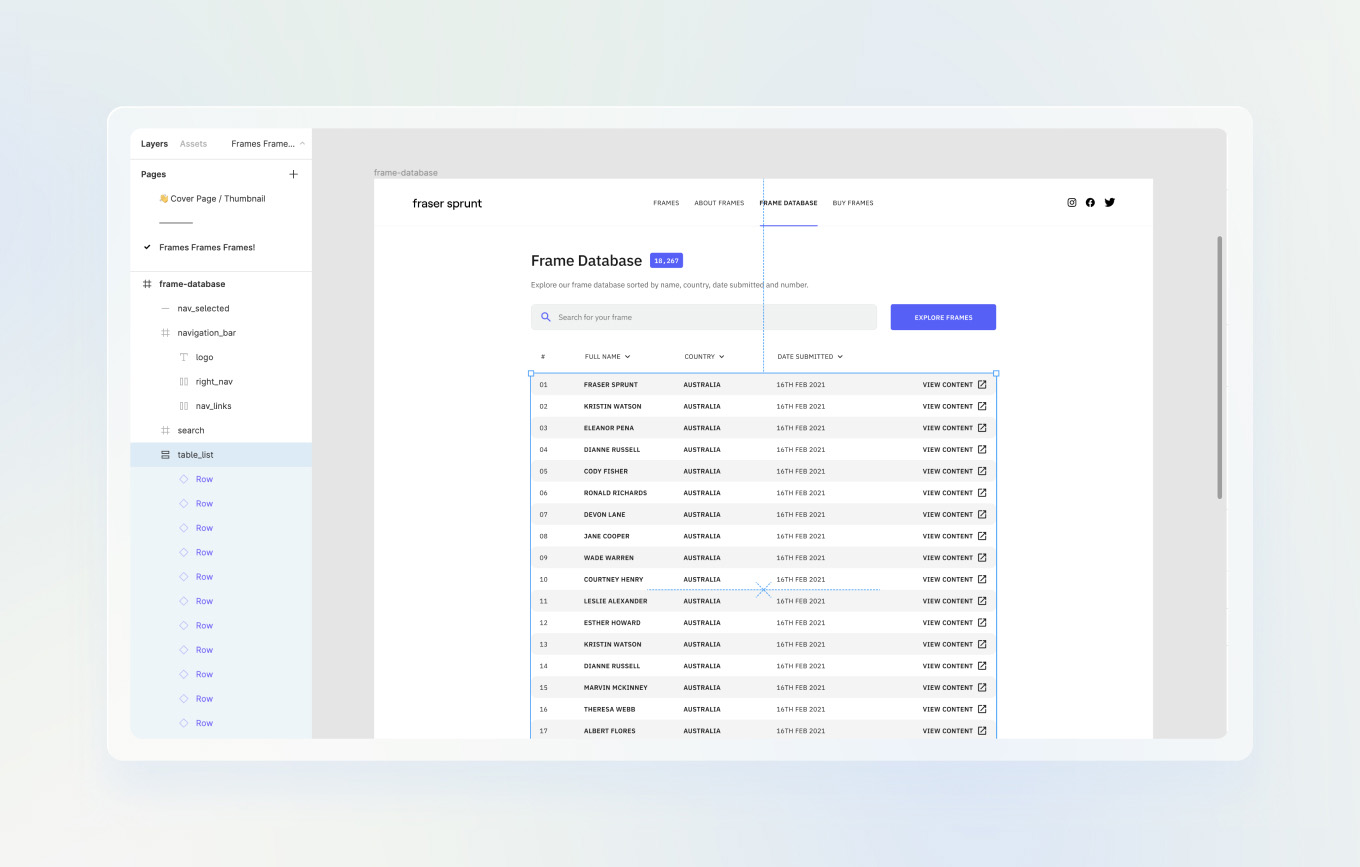
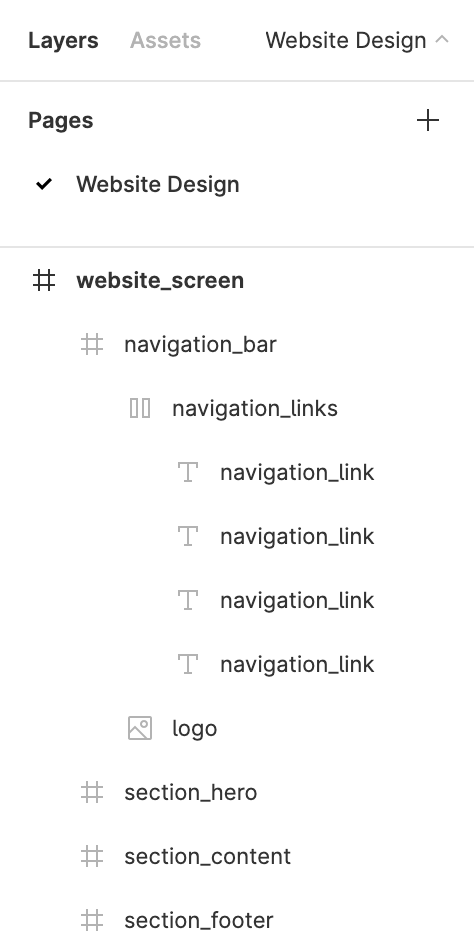
Almost always you will be starting with a blank frame for any design work. Frames act as a parent object, so child objects are influenced by changes made to the parent frame. Because you can nest frames, you can create some very complex and fun interactions. As an example, a website design I would create would generally follow this structure:
- Create a frame with a resolution of your website - Figma has some handy resolution presets just for this! You can then add some grids to this frame to structure the page content
- Let's say I then start designing the navigation bar at the top of the page. I would create another frame within the first frame, and give it some dimensions. (I'd likely select left and right as the constraint, allowing you to resize the parent frame and this frame will resize to fit! There are some very cool stuff you can do with these interactions, but i'll cover this in more detail in another blog post).
- Within this navigation bar frame, I can start designing the navigation bar elements such as a logo and navigation text. You will then need to set constraints on these elements to make sure they behave correctly on resize.
- You can then follow this general format for the rest of the site sections, creating frames when needed. Following a correct structure from the beginning of your document creation will make your life easier down the road (trust me)
If you follow this general structure you will have a good base for responsive design work and a clear, layer structure.
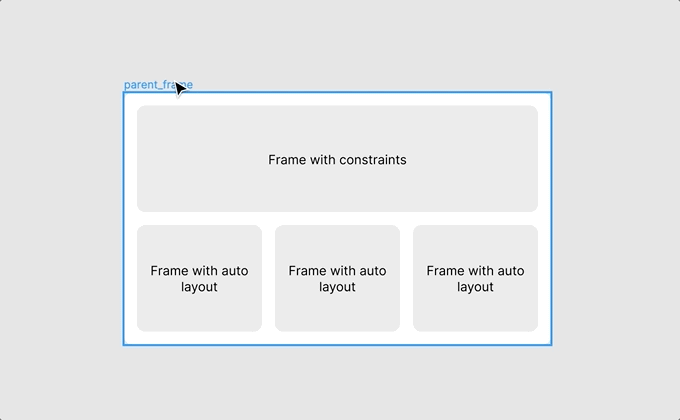
Situation Two: Resize without stretching and distortion
To create responsive designs in Figma, a mixture between frames and autolayout can be used.
If you were to just group some element together and then try and resize the group, you will get some funky stretched results. With frames, you can define how elements behave when you resize the parent. If you have nested frames, you can define how a resized frame inside another frame behaves, creating some super cool results.
Taking this process step by step and testing responsiveness is important, as in more complex designs you can end up with structures of tens of frames and groups nested within each other creating some complex reactions. Pairing this with auto layout interactions things can get confusing fast!
Situation Three: Creating Prototypes
In Figma, you can create flows between frames to create prototypes! If you're planning for a design to be prototyped, following a structure that will allow for this from the beginning is important. You can follow Figma's helpful documentation on prototypes here. As a summary, Figma will allow you to connect up frames and create interactions between them. The interactions may be between frames, or within the same frame with animations, or even hide or show other frames. This way you can show how a design should function before developers need to get involved, or get buy in from stakeholders early in design phases.
Frames sound great, but then when should I use groups?
Groups are great to group together like elements, allowing you to interact with them without selecting individual elements one by one. You also may want element spacing to not be a consistent amount, and also move together with constraints, but retain this spacing. Try to experiment by nesting these different element types to see how they interact together.
Auto layout: Frames but cooler
You can add auto layout properties to frames and components, allowing designs to be dynamic to their contents. Auto layout is what excites me about Figma, letting me to quickly create layouts with consistent alignment and spacing, that respond on resize.
If you want to learn more about Auto Layout, check out Figma's help article here. I'll be going in depth into the power of Auto layout in the future on this blog, so be sure to come back and check later for some more content!
Want to learn more? Get in touch!
Get in touch to discuss what will make your next project a success. Do you instead just want to chat about design, or have a couple questions? No worries, let's chat.
Get in Touch!Why do design with Figma?
Throughout my 10+ year design career, I've experimented with various tools, each offering its own unique strengths and weaknesses. For me, the key to a great tool is how effectively and quickly it translates my ideas onto the page.
When I switched to Figma, I saw my productivity skyrocket. Features like auto layout in particular have allowed me to recreate past designs much faster and with greater precision. If you’re ready to elevate your design game, give Figma a try by clicking the button below.
Disclaimer: I earn a small commission if you sign up through this link. If you'd like to support my work, click below to get started!